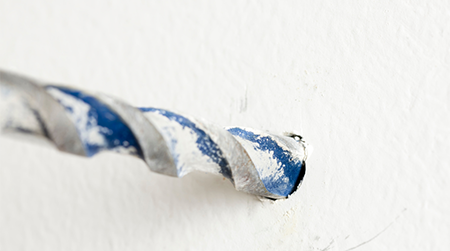
What to Do if Your Drill Bit Breaks in the Wall While You’re Drilling
Whether you’re doing something simple like hanging frames or tackling a larger renovation project, dealing with a drill bit that breaks in the wall while you’re drilling can be extremely frustrating. As anyone who works with bits and power tools knows, bits can break for a number of reasons.
Whether you’ve accidentally drilled at the wrong angle, haven’t kept your bits sharp, added too much pressure, used the wrong bit size or simply ended up with a stuck bit for no obvious reason, broken bits don’t have to mean that your entire project is ruined.
With a few simple strategies, you can extract your bit and continue with minimal stress. In this guide, we’ll share some tips on how to deal with drill bits that break in the wall as you’re drilling brick or other masonry.
Drill Bit Broken in the Wall While Drilling? Here’s What to Do…
Before you lose all hope, here’s what to do if your drill bit breaks off when you’re drilling holes into wall or other types of masonry.
Turn off your drill immediately
The first thing to do is turn off your drill immediately. Accidents can happen if you leave a drill running when the bit is stuck. You will need to remove the bit from the chuck in order to try and remove the broken bit, which means first turning off the drill and setting it aside somewhere safe. Do not ever try to force a stuck bit out using your drill. This will lodge the bit further in, damaging the material, bit and your drill. It can also pose a major safety risk.
Assess the situation
Once your drill is off and the bit is removed from the chuck, you can assess the situation to see what can be done. Take a look at the wall, the hole your bit is stuck in and the bit itself. See how deep the bit has gone into the wall - if it’s not too deep, it may be easier to remove. Try to see if you can get an idea of why the bit may have broken. If it looks like a clean snap, it may be due to excessive force. If you can’t see any obvious reason, don’t panic. You’ll hopefully be able to see more when you start to work at getting the bit out of the wall.
Ensure your work area is safe
Next, to prepare for the broken drill bit extraction, you’ll need to make sure that your work area is safe. If you’re drilling near any electrical wires or outlets, make sure that everything is disconnected. Lay down a protective cover if needed. Gather all the tools you will need to help pry the bit out. These tools include needle-nose pliers, a hammer and a flat-head screwdriver.
Attempt to remove the broken bit
Now that you’ve got everything in place, you can begin the extraction process. Depending on what you’ve been able to see during your initial inspection, the method of extraction could be simple or more complex. If the broken bit is sticking out from the wall and not drilled too deeply, you may be able to use your needle-nose pliers to carefully grip the bit and rotate counterclockwise to remove it from the hole. Always wear protective gloves as broken bits are extremely sharp.
If that doesn’t work, you could try a flat-head screwdriver to gently tap around the area where the bit is stuck, to see if you can loosen it to make it easier to remove. Make sure you tap very carefully to prevent damaging the bit even further.
Consider other methods
With any luck, your bit should have gotten out using one of the above methods. If you still can’t get it out, you may need to try something else. You could try carefully drilling a new hole right next to the stuck bit, using a smaller, very strong bit. This could loosen the broken bit enough to remove it from the wall.
If you still can’t get the broken bit out, you may need specialised tools. Extraction kits require some expertise but they are designed specifically for the purpose of removing stuck bits, so they could be a great investment for your toolkit if you use your drill frequently.
Seal the hole properly
When you finally get the broken bit out of the wall, it’s time to seal the hole so that you can continue working. Depending on the material of your wall and the size and depth of the hole, this can be done using filler designed for the wall material.
Always make sure that you choose the right filler and wait for it to completely dry before you try and do any drilling in the same area.
As the saying goes, prevention is better than cure. While it’s hard to avoid problems such as stuck or broken bits, one of the best ways to prevent this common issue is to invest in quality bits and follow best practices when caring for your bits.
If you’re looking for high-quality masonry drill bits, Ruwag has a variety on offer, ensuring the best results for every project.

