How to Make a Drill Bit Organiser
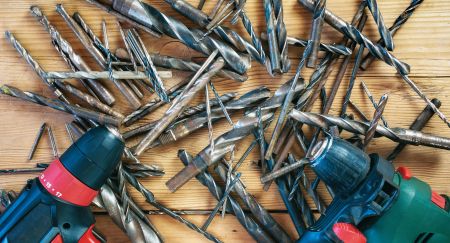
As anyone who’s ever battled with a messy toolkit knows, keeping drill bits organised prevents a lot of wasted time, headaches and frustration. When you use your drill often, it is inevitable that your bit collection starts to get messy. You may have started with bits kept in their original packaging but over time, they soon become lost in a sea of other bits. When you start trying to find a specific type or size of drill bit, you are often forced to end up unpacking everything and even that doesn’t guarantee you will find the bit you are seeking.
The simplest way to keep things from reaching that point is to put together a drill bit organiser that allows you to find what you need without having to spend hours searching. Making an organiser doesn’t have to cost a lot of money. In this guide, we’re sharing some ideas to get you motivated for some much-needed bit of organising.
Putting Together a Drill Bit Organiser
Whatever your DIY experience, you’ll find a simple solution in this list of drill bit organisers.
Tray organiser
This option is ideal for beginners and those who want a quick and easy way to keep things sorted. You don’t need to bring out any tools or do any work. Find a large tray or box to use as a base. You can also use a drawer if your workshop has desks or similar storage containing drawers. From there, find smaller plastic containers that can fit into the tray. You may need to do some shifting around to get everything to fit properly.
As a general guide, the largest tray can contain the bits you use most often. If your trays are the same size, organise them according to bit size or type. Use labels inside the smaller trays to indicate the size or bit type. You can then slot the entire tray into a drawer or onto a shelf for easy access. A big benefit of this option is that you can easily move things around as needed or add more smaller containers by using a larger tray.
Tabletop organiser
If you’re keen on a fairly simple DIY project, a tabletop organiser will be ideal. This organiser is made using a wood Forstener bit or a spade bit. You will need a block of wood that is big enough to include spaces for bits in assorted sizes. This bit will have flat-bottomed holes for bits in each size, with each hole carefully spaced along the block of wood.
Start by measuring the space for each size hole. The holes will gradually increase, so you will need to leave enough room between them to avoid overcrowding. Once you have measured everything out, make pilot holes or small dents in the centre of each hole, then use your Forstner bit to create the holes along the block of wood. You can enlarge the holes using a spade bit or use larger-sized Forstner bits. The inside of each hole can be smoothed out and then labels can be added above each hole. This is a good option if you want to have easy access to your bits that are sorted by size. You can go one step further and create a larger hole for specialised bits such as wood bits (or make a separate organiser for these).
Wall-mounted organiser
For those with a bit more experienced, there are several types of wall organisers to try. These can be as simple or complex as you need. For a very basic organiser, you can make a variation of the tabletop organiser, with thinner planks added to a backing board in rows. A Forstner bit will allow you to create angled holes, which will keep bits in place.
Beginner-friendly wall-mounted organisers include small plastic containers mounted onto slotted wall panels. For these, you can purchase cheap containers in assorted sizes, along with small self-adhesive hooks. Containers can also be attached to solid wall panels using strong double-sided tape or superglue. For pegboard storage, softer plastic containers can be fitted with small hooks, allowing you to easily move them on the board.
Magnetic organiser
Magnetic organisers are quick, easy and cheap. These are best for tabletop organisers but they can be mounted to the wall if you have strong magnets and clean bits that will stick to magnetic strips without coming loose. For this organiser, all you will need is a metal tray, a few magnetic bars in assorted sizes and strong double-sided tape or superglue to hold the magnets in place.
To start, organise the tray according to how you want your bits to be organised and where you want them to be placed. Add a larger magnet for larger bits, with magnets decreasing in size as your bits get smaller. You can add a long magnet that runs along one side for speciality bits or for screw attachments. Add labels above or below each row and you will have easy access to your bits while keeping them in place when not in use.
Tool organiser
A tool organiser is the best way to keep your drill bits and your drills organised, for a neater workshop. When your entire workshop is organised, you will find it easier to find not only your various bits but also your tools. You can read our guide to making a tool shelf to see how to make one of these organisers. To make the organiser even more useful, attach a wall-mounted organiser below, such as the easy pegboard organiser above.
We hope that these organisers give you some inspiration on how to keep things neat and tidy. Not into DIY? Don’t worry. At Ruwag, we offer a range of drill bit sets that include handy cases that keep your bits organised. These can be kept in your tool storage cupboard, for easy access and clearly labelled sections sorted by size and bit type.

